✏️ Edit Diagram¶
The Edit Diagram menu is the central tool for creating and structuring your knowledge network. Here you can create new items (nodes) and relations (lines), organize their hierarchy, and use the powerful automation features of the InfoRapid KnowledgeBase Builder.
🛑 Important preliminary note: Select items & the context toolbar¶
Before you fully utilize the individual functions in this menu, it is extremely important to understand the following basic principles of the app:
- Create the first item: When you create a completely new database, you will not see a node in the center of the empty screen yet, but a button "Create new item". Clicking on it opens the dialog for your very first root item.
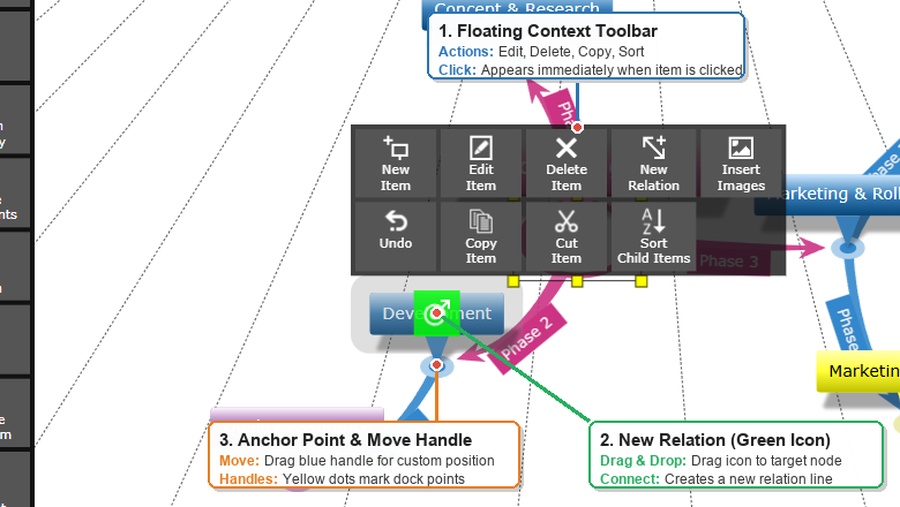
- Select vs. Center vs. Move vs. Connect: Each node provides intuitive interaction handles:
- Click the speech bubble: Selects the item and opens the floating context toolbar directly at the node for lightning-fast actions (edit, delete, link, sort, reset position).
- Double-click the anchor circle: Immediately makes this item the new root item (center) of the displayed diagram with a smooth animated transition.
- Drag from the round blue connection button (crosshair inside the speech bubble): Creates a new relation line to any target node via drag and drop.
- Drag the blue square with the four-way arrow (at the anchor below the speech bubble): Moves the node manually, shifting it relative to the automatic layout (the white dots on its edge indicate connection dock points).
- Edit items and relations: To edit an object, you must first click (select) the item or the relation line in the diagram.
- Working with the keyboard: Selecting, creating and editing also work without a mouse: Enter creates the first item on the empty canvas and otherwise edits the selected one, Tab creates a child item, Shift+Enter a sibling item, and the arrow keys move from item to item. All shortcuts are listed under Keyboard Shortcuts.
- Reset positions: Have you moved nodes manually and want to restore the perfect auto-layout? Select any item. In the toolbar that appears on the item, you will find the buttons "Reset Position" (resets only the shift of this single item) and "Reset all Positions" (cleans up the entire diagram again).
↩️ Undo & Redo (Action History)¶
At the very top of the left Edit Diagram menu is the action history for comprehensive error correction:
- Expandable History Lists (Accordions): "Undo" and "Redo" are not just simple single-step buttons, but expandable list views. Clicking the header expands the history.
- Chronological Action Log: Each recorded action is listed with a descriptive human-readable label (e.g., "New item", "Import Wikipedia article", "Change formatting", or prefixed with "AI: ..." when driven by AI automation).
- Targeted Point-in-Time Restore: You do not have to click through steps one by one. Clicking any entry in the history immediately restores the diagram to that exact point in time — all subsequent steps are undone at once and moved onto the redo stack.
- Dynamic Redo Accordion: The "Redo" section appears dynamically whenever undone steps exist, enabling fast forward-restores in the same manner.
- Persistent Database Storage: The system persists the last 200 work steps directly in the SQLite database file (
.kdb). Your undo/redo history remains fully intact even after closing and restarting the application.
- Quick Corrections via Context Toolbars: Floating toolbars on every selected node and relation include quick Undo and Redo buttons, allowing immediate fixes without opening the sidebar.
🔵 Item¶
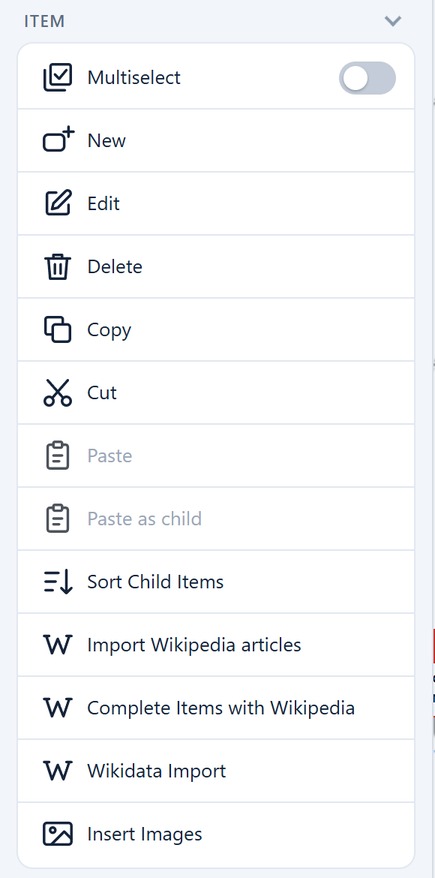
In this section you will find all the tools for direct editing of individual nodes in your mind map. The commands always refer to the currently selected item.
- Multiselect: Activates a mode in which you can select several items in the diagram at the same time to change their formatting in one go, copy, or delete them.
- New: Creates a new item in the current diagram.
- Edit: Opens the properties dialog of the currently selected item. From here, you can adjust all essential item properties. (Details below)
- Delete: Removes the selected item along with all its attached relations from the database.
- Copy / Cut / Paste: The classic clipboard functions to duplicate or move items.
- Paste as child: Pastes an item copied from the clipboard as a direct subcategory (child node) of the currently selected item.
- Sort child items (Ascending / Descending): Automatically sorts all direct sub-items (branches) of the selected node alphabetically in ascending or descending order. Also available in the quick context toolbar.
- Import Wikipedia articles: Opens a search dialog to research Wikipedia articles directly and import them into your mind map.
- Mandatory Prerequisite: Before clicking, the desired parent node must be selected in the diagram (indicated by the move handle at its anchor and the visible context toolbar). Without an active selection, imported nodes will be created without connections and will not be anchored in the visible canvas.
- Download Images Option: The checkbox Download images for offline mode / printing controls whether the Wikimedia images are embedded as Base64 data into the name, the description and the note of the item, or whether only the online image address is saved. Unchecking this option accelerates imports considerably (~5 seconds instead of >30 seconds) and keeps database size lightweight, while images still render normally when connected to the internet.
- Import images as attachments (Checkbox): The second checkbox takes a different route than the first. When it is checked the item name stays plain text, and the main image of the article — the one that would otherwise sit in the name — is fetched at a high resolution (up to 1280 pixels wide), stored as a standalone attachment in the attachment repository and attached to the item. The description and the note are left untouched. Article and attachments are created in a single undo step, and importing the same articles again updates the existing attachments instead of creating duplicates. The option also applies to Complete Items with Wikipedia.
- Multi-Selection Hierarchy: Wikipedia returns up to 10 matching results with checkboxes. Check a single item to import it as a direct child node. If multiple checkboxes are selected at once, the first checked item becomes a child of the selected node, and all subsequent checked items become children of that first imported item.
- Complete Items with Wikipedia: Automatically queries Wikipedia for existing item names in your diagram and enriches them with descriptions, rich background notes, and images without disrupting existing structural connections.
- Wikidata Import: Allows importing complex, structured graph datasets directly from Wikidata using SPARQL queries. Unlike Wikipedia import, no prior node selection is required — it can populate completely empty databases from scratch.
- Query Syntax & Prefixes: The importer automatically maps SPARQL SELECT variable name prefixes to diagram properties:
| Variable Prefix | Mapped Diagram Property | Purpose & Usage |
|---|---|---|
?i_ |
Node Identifier | Unique ID (e.g., Wikidata QID like wd:Q2), prevents duplicate nodes. |
?in_ or ?i_Label |
Node Name | Primary label displayed on the diagram node. |
?id_ |
Node Description | Brief description text (shown when expanding items and inside tooltips). |
?iu_ |
External URL | Direct link URL of the item (represented with a globe icon). |
?ii_ |
Image URL | Node image (rendered directly inside the node). |
?idi_ |
Description Image | Image displayed inside the expanded description. |
?ud_ |
Data field (user data) | Literal value for a field in the Dates tab of the item, e.g. ?ud_birth or ?ud_status. If the database does not know the field yet, it is added to it automatically. ?ud_type sets the type of the item (task, milestone, event, person). |
?udp_ |
Precision of a date field | The Wikidata property wikibase:timePrecision belonging to the ?ud_ field of the same name, so ?udp_birth belongs to ?ud_birth. That is what turns "sometime in 1889" into the year 1889 rather than 1 January 1889. |
?rn_ |
Relation Name | Label of the relation edge connecting to the target item. |
?rn_t_ |
Table Relation | Marks the relation "As Table" (creates an attribute row in the parent node). |
?rc_ |
Relation Category | Assigns a category to the generated relation. |
?ic_ |
Item Category | Assigns a category to the node (determines node shape and color). |
* *Import images as attachments (Checkbox):* Without this option the image from `?ii_` is scaled down and embedded straight into the item name — it appears as a small preview inside the node. With the option checked the name stays plain text and the image is instead fetched at a high resolution (up to 1280 pixels wide), stored as a standalone attachment in the [attachment repository](manage-attachments.md) and attached to the item. Diagram and attachments are created in a single undo step. Images and attachments are identified through their Wikimedia description page: importing the same images a second time updates the existing entries instead of creating duplicates.
* *Literals belong in user data, references in the diagram:* A literal value (date, number, text) becomes a data field of the item through `?ud_` and therefore appears on the [timeline](adjust-view.md#timeline) and in the item table. A reference to another entity, by contrast, belongs in the diagram as a connection, through `?i_` and `?rn_`.
* *The "Values not imported" report:* If single values could not be stored as user data, the import names them in a window of its own at the end. Two cases lead to this: years **before Christ**, which cannot be compared as text, and `?ud_` columns pointing at **another entity** instead of a literal value — the latter belong in the diagram as a connection.
* *Batching Multi-Queries (`#query`):* Multiple SPARQL queries can be run sequentially by separating them with lines starting with `#query`. *Important:* The final query must **not** terminate with `#query`, otherwise the app waits for an empty query block and the wait dialog hangs.
* *Two-Pass Pattern for Large Graphs:* For extensive datasets, run the structural query first without image columns (`?ii_`). Once the graph structure is in place, populate images in a targeted second pass.
* *Example Button:* Clicking **Example** in the dialog pastes a verified, ready-to-run query for the solar system including planets and moons.
- Import Webpage: Reads the contents of a specified URL and transfers it into the diagram.
- Insert Images: Inserts image files from your device into the diagram. These can be stored as a preview directly in the item node or as an attachment (visible in the tooltip). Note: The app automatically offers to reduce oversized images to an optimal 1024 pixels to keep the database performant. Pro tip: Every image or document you attach this way also shows up in the central Manage Attachments panel, where you can re-attach it to other items or import documents without attaching them right away.
📝 The Item Properties Dialog¶
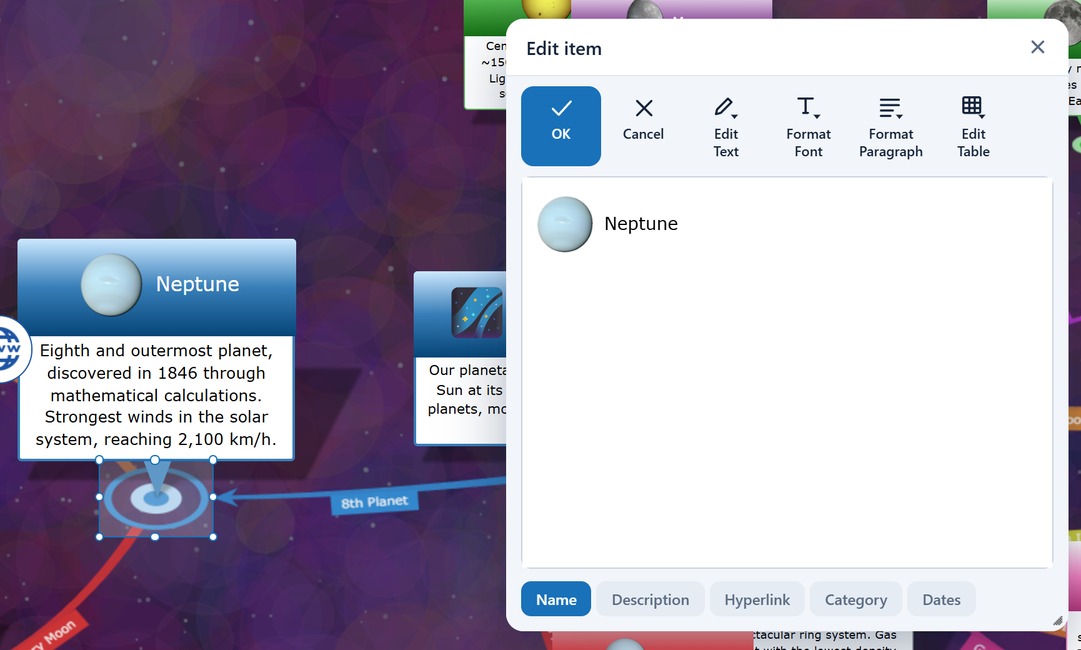
When you edit an item in the diagram, a tabbed dialog opens. This dialog is divided into five tabs:
1. Tab: Name¶
Here you define the main label displayed directly on the node in the diagram. Use short, concise terms, as the text determines the node's visual size.
💡 Pro Tip: Emoji & Icon Badges
You can prefix item names with emojis (e.g.🧠 Artificial Intelligence). The app supports HTML formatting in node names: entering<html><span style="display:inline-table"><span style="display:table-cell;vertical-align:middle;font-size:3em;">🚀</span><span style="display:table-cell;vertical-align:middle"> Rocket</span></span></html>displays a large, sharp 3em icon to the left of the vertically centered text!
2. Tab: Description¶
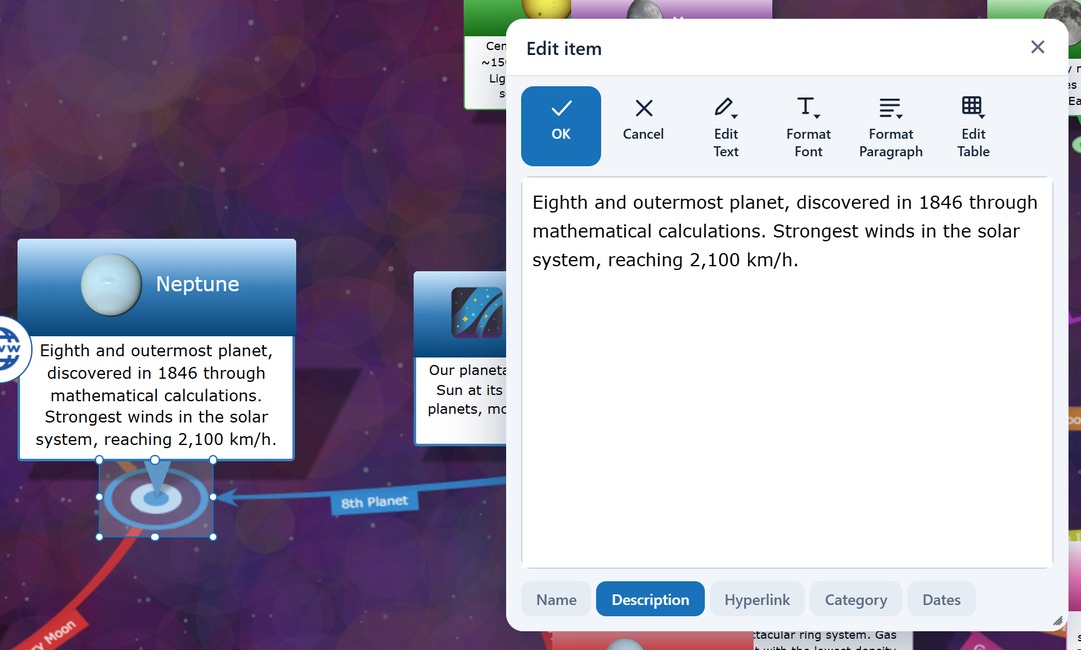
Add a detailed description or explanation here. This text will be displayed to the user as a handy tooltip when clicking or hovering over the item in the diagram. When Expand Items is enabled under Adjust View, the description is shown directly inside the node box.
3. Tab: Hyperlink¶
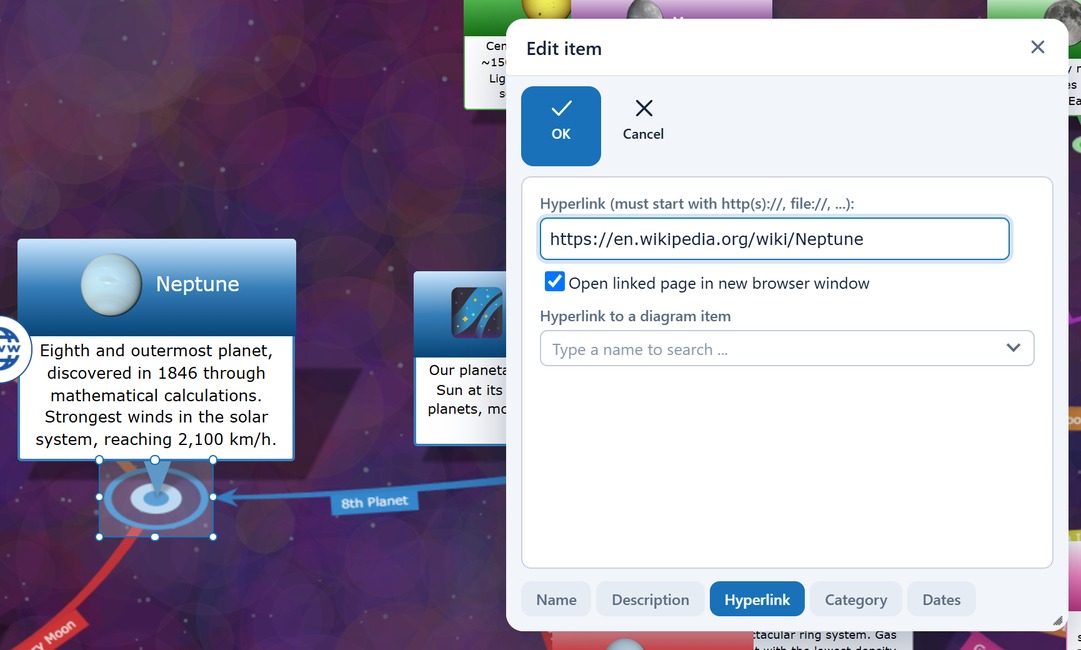
You can enter an external web address (URL) or a local file path here. Once saved, a clickable icon (e.g. a globe) appears on the item to open the link.
- Open in new browser window (Checkbox):
- Checked (default): Clicking the globe icon opens the webpage in a new browser tab (
target="_blank"). - Unchecked: Opens the webpage directly within an integrated, full-screen iframe viewer inside the app (with a top-right close button). In JSON exports, this mode is saved with the
§ifURL suffix.
- Checked (default): Clicking the globe icon opens the webpage in a new browser tab (
- Internal Item Links (
itemid://): The field also accepts an address of the formitemid://71. The item then does not link to the web but to another item of the same database: a click loads that item as the new root of the diagram. See Notes on Item for details.
4. Tab: Category¶
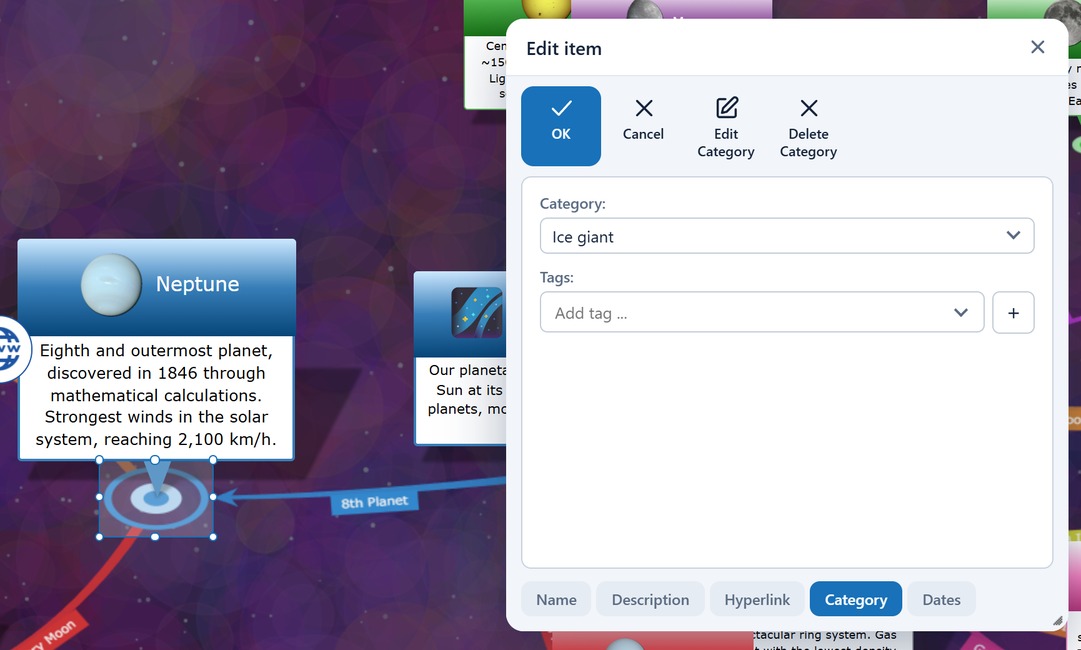
Assign a category (e.g. "Projects", "Ideas") to group items visually by color or filter them within the diagram. When category labels are enabled, the category name appears as a small label above the item.
Below the category field you will find the Tags field. While an item can have only one category, you can attach any number of tags to it. Tags are searchable and filterable just like categories, but they do not influence colour and shape — see Tags.
The buttons Edit Category and Delete Category act on the category itself. The edit dialog holds the name and the field Type for new items: it decides which type in the Dates tab a newly created item of that category is preset to. You do not change a category's colour here: select an item of the category and pick a colour under Format Diagram → Item – it then applies to every item of the category.
5. Tab: Dates¶
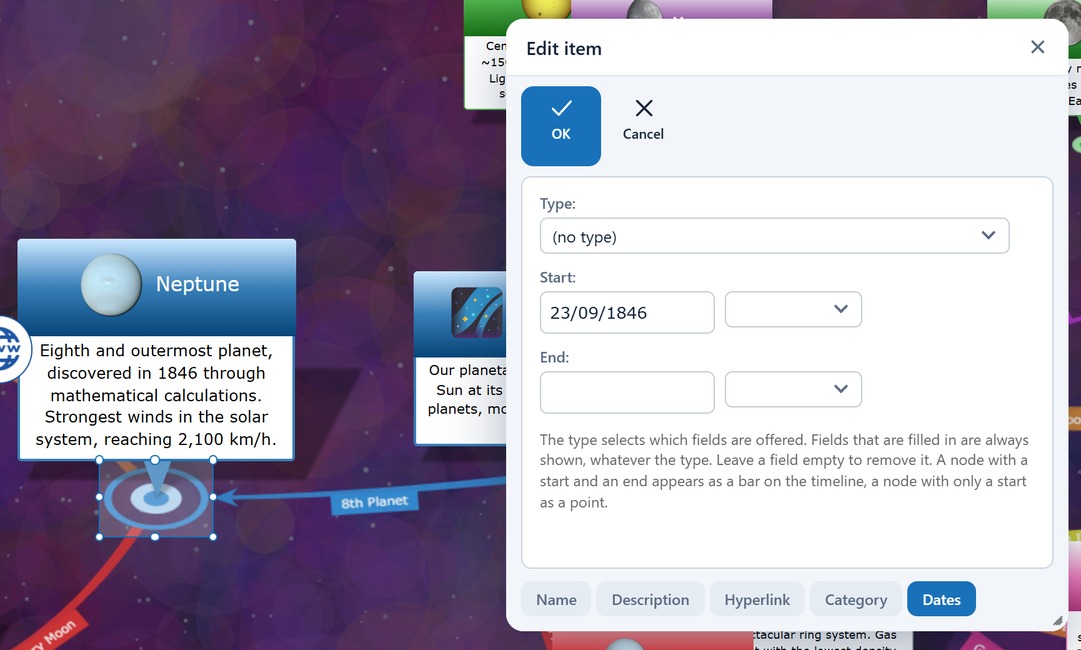
This tab holds the user data of an item: structured single entries such as points in time, periods, status, priority, estimate or assignee. Unlike the free-form description these are fields that can be evaluated — the application draws the timeline from them, shows them as table rows inside the item itself, and passes them on to the table view and to exports.
The type decides which fields are offered
At the very top you choose the type of the item. It is not a commitment but a preselection: it decides which fields the dialog offers and which of them reach the timeline.
| Type | Fields offered |
|---|---|
| (no type) | Start, End |
| Task | Start, Due, End, Status, Priority, Estimate, Assignee |
| Milestone | Due, Status |
| Event | Start, End, Location |
| Person | Born, Died, Place of birth, Place of death |
- Fields that are filled in always stay visible. Turn a person into a milestone afterwards and the life dates do not disappear — they merely move to the end of the dialog, under the heading More entries. Changing the type can therefore neither hide nor delete anything.
- An empty field removes the entry. Clear the content of a field, save, and the entry is gone.
The kinds of field
- Date fields (Start, End, Due, Born, Died) consist of an input field with a calendar and a time selection. A click into the input field opens the calendar, and a click on a day takes it over and closes the calendar again. Leave the time empty and the entry stays accurate to the day. The calendar, the date notation and the 12- or 24-hour count follow your interface language. For Start/End and Born/Died the dialog makes sure the second date does not fall before the first.
- Choice fields: Status (Open, In progress, Done, Cancelled) and Priority (Low, Medium, High, Critical).
- Number field: Estimate, with one decimal place in the notation of your language.
- Text fields: Location, Place of birth, Place of death and Assignee.
Where the values show up
- In the item itself: Every filled field becomes a row of the small table below the item name — as long as Show Data Fields is switched on under Adjust View, which it is by default. The rows sit underneath those coming from table relations and appear in the same order as in the dialog. The type itself does not become a row: it is a statement about the item, not content.
- On the timeline: every pair of fields whose start is filled becomes an entry of its own there. A task with a period and a due date therefore appears twice on the strip: once as a bar and once as a diamond.
- In the table view and in the JSON/XML export, where the fields sit in the
udobject of the item properties.
Let a category suggest a type
Click Edit Category in the Category tab and you will find the field Type for new items there. Every new item of that category then comes with the matching type already preset — a category "Employees", for instance, suggests the type Person. Category and type remain two separate traits: the category is freely named and cut differently in every database, while the type carries the same name across all databases so that the timeline and the filters recognise it. The binding is therefore a suggestion and not a rule — you can always override the type in the dialog.
Own fields and own types per database
Beyond the built-in fields a database can carry further ones. The Wikidata import (further up on this page) creates them automatically: every column with the prefix ?ud_ that the catalogue does not know yet is added to the database as a new field — with the column name as its label and the data type derived from the value. The same declarations can be set by AI Control. Own fields appear in the dialog under More entries and behave like the built-in ones from then on.
🎨 Item Templates¶
To ensure a consistent design in large diagrams, you can save formatting (such as colors, frame shapes, and fonts) as templates.
- New: Creates a new design template based on the formatting of the currently selected item.
- Update: Overwrites an existing template with the current design settings.
- Rename: Changes the name of the saved template.
- Delete: Deletes the selected template from the list.
- Apply to Item: Transfers the saved design to the currently selected item in the diagram.
🔗 Relation¶
Here you control the lines and relationships between the individual items.
- New: Starts the tool for drawing a new relation line. Pro tip: It's even faster to do this directly in the diagram by tapping/clicking on the start item and dragging and dropping the pointer to the target item.
- Tree edge or cross-link: If you connect two items that are both already in the diagram, a cross-link between their branches is created – the levels of the items do not change. If the items are far apart, choose the end point after New conveniently by its name.
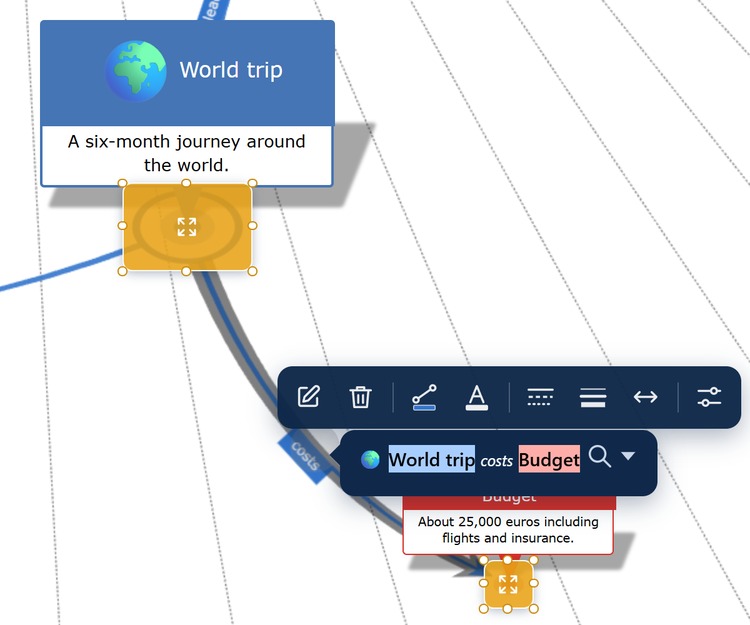
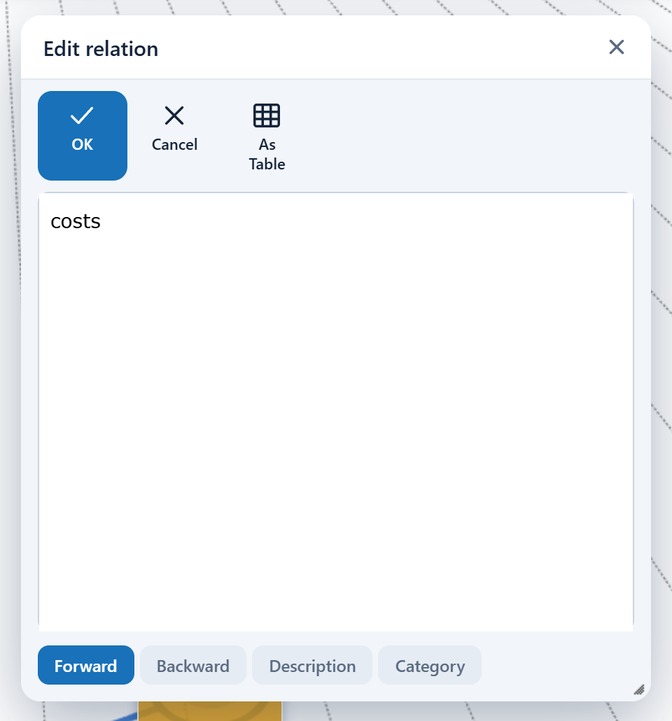
- Edit: Opens the dialog for the relation. Here you can define the line name (for forward and backward direction) or save descriptions for the line.
- As Table: Can be switched separately for the forward and the backward direction. With the option active, the relation is no longer drawn as a branching line but shown as a row of a small table inside the item itself – ideal for items with many attributes such as year of birth or place of birth. Whether such relations are additionally still drawn as lines is controlled by Show Table Relations under Adjust View; a worked example is in Build a Knowledge Base.
- Which label appears on the line: A relation with a forward and a backward label is always read from the end that is closer to the root item. The line therefore leads away from the root and carries the label for exactly that direction. Example: the relation “Building Permit → Foundation” reads “Prerequisite for” forward and “Dependent on” backward. If the permit is the root, you read “Permit – Prerequisite for – Foundation”; if the foundation is the root, the same line points to the permit and reads “Foundation – Dependent on – Permit”. A relation without a backward label, on the other hand, always points in its stored direction.
- Formatting: Color, line style, line width and arrows can be set for each relation individually – select the relation, then Format Diagram → Relation.
- Delete: Deletes the selected relation line without deleting the items attached to it.
🎨 Relation Templates¶
Similar to the item templates, you can manage designs for your lines here (e.g. line style, line width, arrows, and color).
- New / Update / Rename / Delete: To manage the line designs.
- Apply to Relation: Transfers the saved line formatting to the currently selected relation.
📥 Insert (Automation & Expert Tools)¶
This submenu offers advanced functions to generate diagrams fully automatically from existing data.
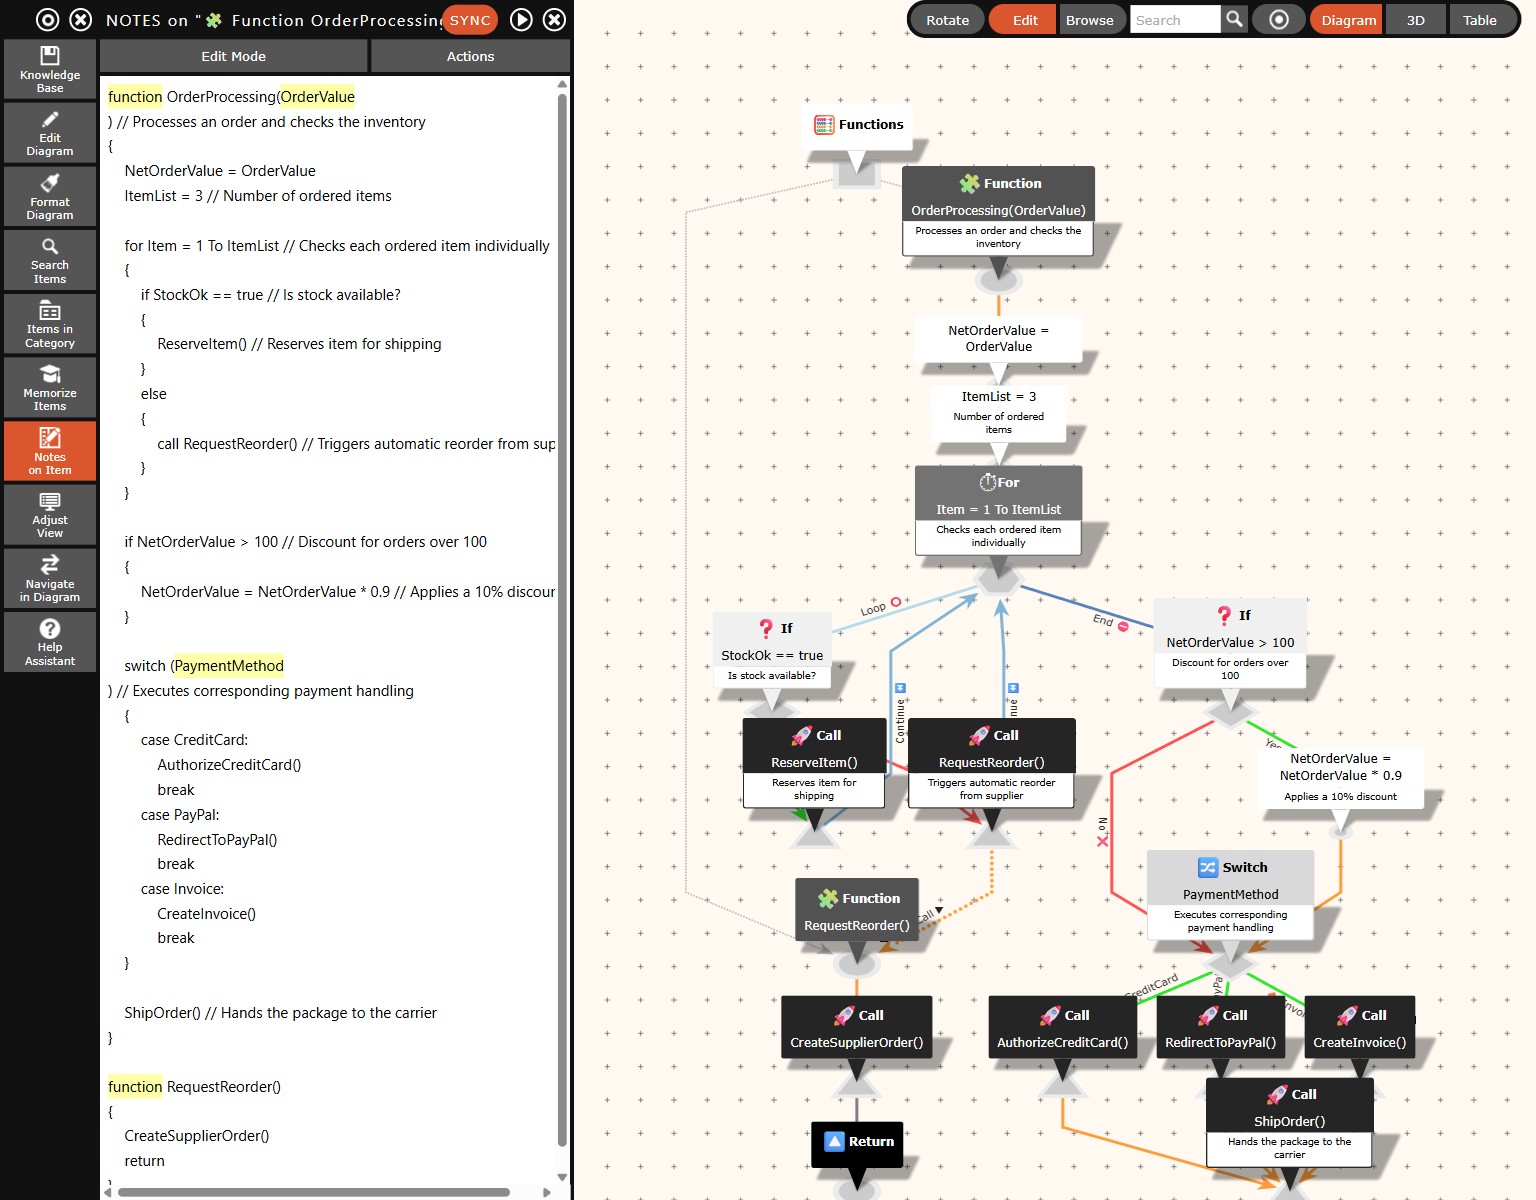
- Pseudocode: A powerful tool for software developers and process planners. Enter simple text commands (like
if,while,switch), and the app automatically generates a perfectly structured, complex flowchart from it. See also the detailed Pseudocode Syntax Reference. - Outlined Text: Generates branched mind maps and networked knowledge graphs from structured texts, HTML lists, or Markdown files (
.md). You can enter text directly, paste it, or upload/drop files. See also the detailed Outlined Text Syntax Reference. Three formats are supported:- Text: Classic tab- or space-indented outline text with KBB syntax (
::for categories,>>for connections,(description)for tooltips,{...}for dates and user data). - Markdown: The outliner Markdown format (as used in Logseq) using bullet points (
-) and indentation. Supports headings (# H1etc.), wiki links ([[Target Page]]) for cross-references in the knowledge graph, hashtags (#tag), block references (id:: block-id,((block-id))), and properties (key:: value) for categories, notes, and task/date data (type::,status::,priority::,start::,due::), which are directly visualized on the timeline. - HTML: Nested HTML lists (
<ul><li>), headings (<h1>–<h6>), and definition lists.
- Text: Classic tab- or space-indented outline text with KBB syntax (
- Textanalysis: An ingenious function for knowledge extraction. Paste a long continuous text, and the software analyzes it for frequent and relevant terms (excluding definable stop words). From this, a mind map of the key terms is automatically created, whereby the respective sentences from the original text are stored as notes on the nodes.
- Run Script: Executes automation scripts in JSON format. This function is primarily designed for internal purposes and the app's integrated Help Assistant.