🚀 Getting Started (Quick Start Guide)
Welcome to the InfoRapid KnowledgeBase Builder! Since this software is designed to manage large knowledge networks, the multitude of menus and functions can seem overwhelming at first.
In this quick-start guide, we will create your first networked project, format it, navigate in 3D space, and review the primary views.
Let's get started right away!
🛑 Important preliminary note: Auto-Layout & manual moving
Users coming from simple drawing programs often wonder: "Why can't I just freely move the text boxes on the screen with the mouse?"
The program primarily uses an automatic layout (Auto-Layout). It calculates a non-overlapping arrangement for thousands of items in real time. You can nevertheless manually move the nodes, if you know the principle of the app:
- The anchor point (circle): Each item in the diagram looks like a tooltip (a speech bubble) pointing down with a small triangle to a tiny circle. This small circle is the actual "node" in the mind map!
- How to move items: Do not click on the large text box at the top, but select the small circle at the bottom and drag and drop it to the desired location.
⚠️ Important behavior when moving: The system always saves this shift relative to the automatically calculated position and makes it dependent on the current root item (the current center of your diagram). This means: If you later make another item the new center or change the basic layout, the program completely recalculates the structure. Your manual shift will then be reset to 0 for this new view so that the layout does not "break".
(Tip: If you have manually "lost track", you can cancel shifts at any time. Simply click on an item. In the toolbar that now appears, you will find the buttons "Reset Position" to cancel only the shift of the selected item, and "Reset all Positions" to return the entire diagram to the perfect auto-layout state).
Step 1: Create & enrich the first item
When you start the program with an empty diagram, you will not see a finished node in the center of the screen, but a button in the form of an item with the text "Create new item". Let's turn this into the main topic of our first project:
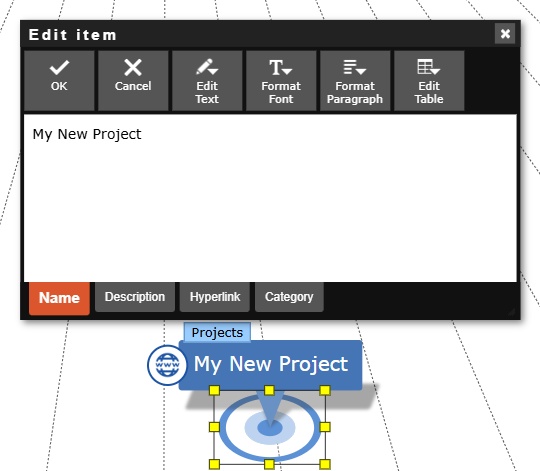
1. Click on this button. The "Create new item" dialog opens immediately.
2. The most important part is the Name. Type your topic here (e.g., "My new project").
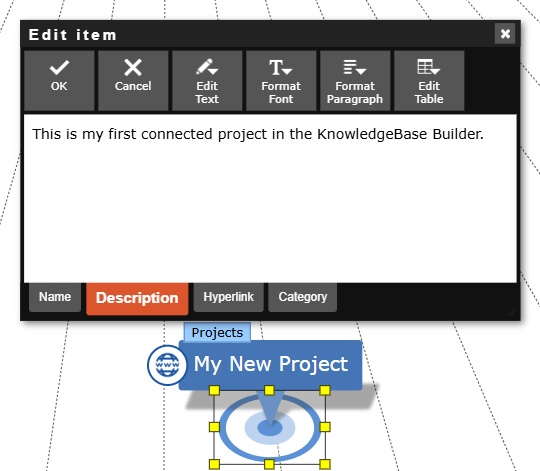
3. Add a short text under Description. This will later be displayed as a handy tooltip when you click on the item in the diagram.
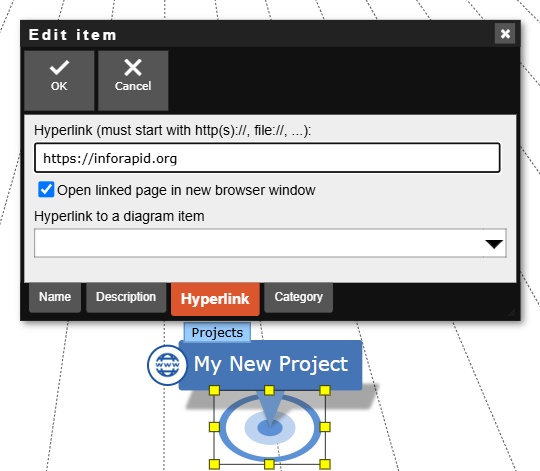
4. Optionally, you can add a Hyperlink (e.g., to a website), which will then appear as a clickable icon on the item.
5. Click OK. Your first real item is now in the diagram!
Pro Tip: Do you want to write longer texts? Via the "Notes on Item" menu on the left side, you can attach a note of any length in HTML format (including images and tables) to each item.
Step 2: Network ideas & label lines
Now we add subpoints (child items) and connect them:
- Click on your central item and hold down the mouse button (or your finger).
- Now simply drag the pointer away from the item into the empty space and let go.
- The program automatically creates a new item and draws a relation line. Give the new item a name and click OK.
- Repeat this until you have three subpoints.
- Label relations: Now click on one of the newly created relation lines. This selects it and a toolbar appears. Click the "Edit Relation" button there to open the dialog. Here you can give the line a name (e.g., "leads to" or "requires") so that the arrows between your items also get a meaning.
Step 3: Adjust & format the diagram
Now we ensure a better overview and a nicer design:
- Show texts directly: Open the "Adjust View" menu on the left. Check the "Expand Items" box there. Your previously entered description texts will immediately be displayed in full length directly in the diagram, instead of just as a tooltip.
- Different layout: In the same menu under "Diagram", you will find the Layout drop-down field. By default, a compact layout is active; change this as a test to "Mind Map radial". The items will now arrange themselves circularly around the center.
- Colorful designs: Items and relations can be formatted in many ways. Important: To be able to adjust properties of items or lines, you must first click (select) them in the diagram. Otherwise, the corresponding entries in the menu are not visible! So select an item or a line, then open the "Format Diagram" menu and change, for example, the Background Color, the Font Size or turn the relation line into a Dotted Line.
Step 4: The 3D magic and other views
We will now leave the classic 2D view and unleash the full visual power of the app in a true three-dimensional space:
- Switch to 3D mode: Look at the toolbar on the top right. Click the 3D button. The program now switches to a completely independent 3D environment.
- Free navigation in space: You can now completely freely orbit, view, and arrange the diagram:
- Orbit: Hold down the left mouse button (on mobile devices: swipe with one finger) and drag to orbit freely around the center of your diagram.
- Zoom: Use the mouse wheel (on mobile devices: pinch or spread with two fingers) to seamlessly zoom in or out of the network.
- Pan: Hold down the right mouse button (on mobile devices: swipe with two fingers simultaneously) to shift the entire diagram up, down, left, or right on the screen.
- Automatic rotation: Click on Rotate in the same toolbar. Sit back: Your mind map now floats and rotates smoothly on its own in space (Clicking Stop ends the rotation).
- Table view: Click the table icon on the top right. Here your data is displayed structured as a table. This is extremely helpful when you want to scroll through large amounts of data. Afterwards, return to the 2D or 3D view with the Diagram button.
Step 5: Navigating and Saving
As your network grows, you will never see everything at once, but always just a section.
* The focus (The search): Look at the input field labeled Search at the top right. As soon as you start typing letters there, you will see a list of item names that begin with these letters. Press the Enter key, the first item from this list is directly made the new root item and the view jumps there. You can of course also just select another item from the displayed list to make it the new root item.
* Save: Save your work via Knowledge Base -> Save as as a local .kdb file. Save the file in a cloud folder (like Google Drive or OneDrive) to use it seamlessly across all your devices.
🎉 Congratulations! You have just mastered the most important basic functions of the InfoRapid KnowledgeBase Builder.
🤖 Discover more: Do you want to see how to generate flowcharts from code or how the map behaves in 3D view and radial layout? Go to Help Assistant and start the interactive Intro – the program will then build a finished example network live for you!